Starting in MicroStrategy ONE Update 12, you can leverage Licenses (formerly known as License Manager) in Workstation . Licenses can be used for auditing your MicroStrategy installation to keep it compliant.
You can use Licenses to to:
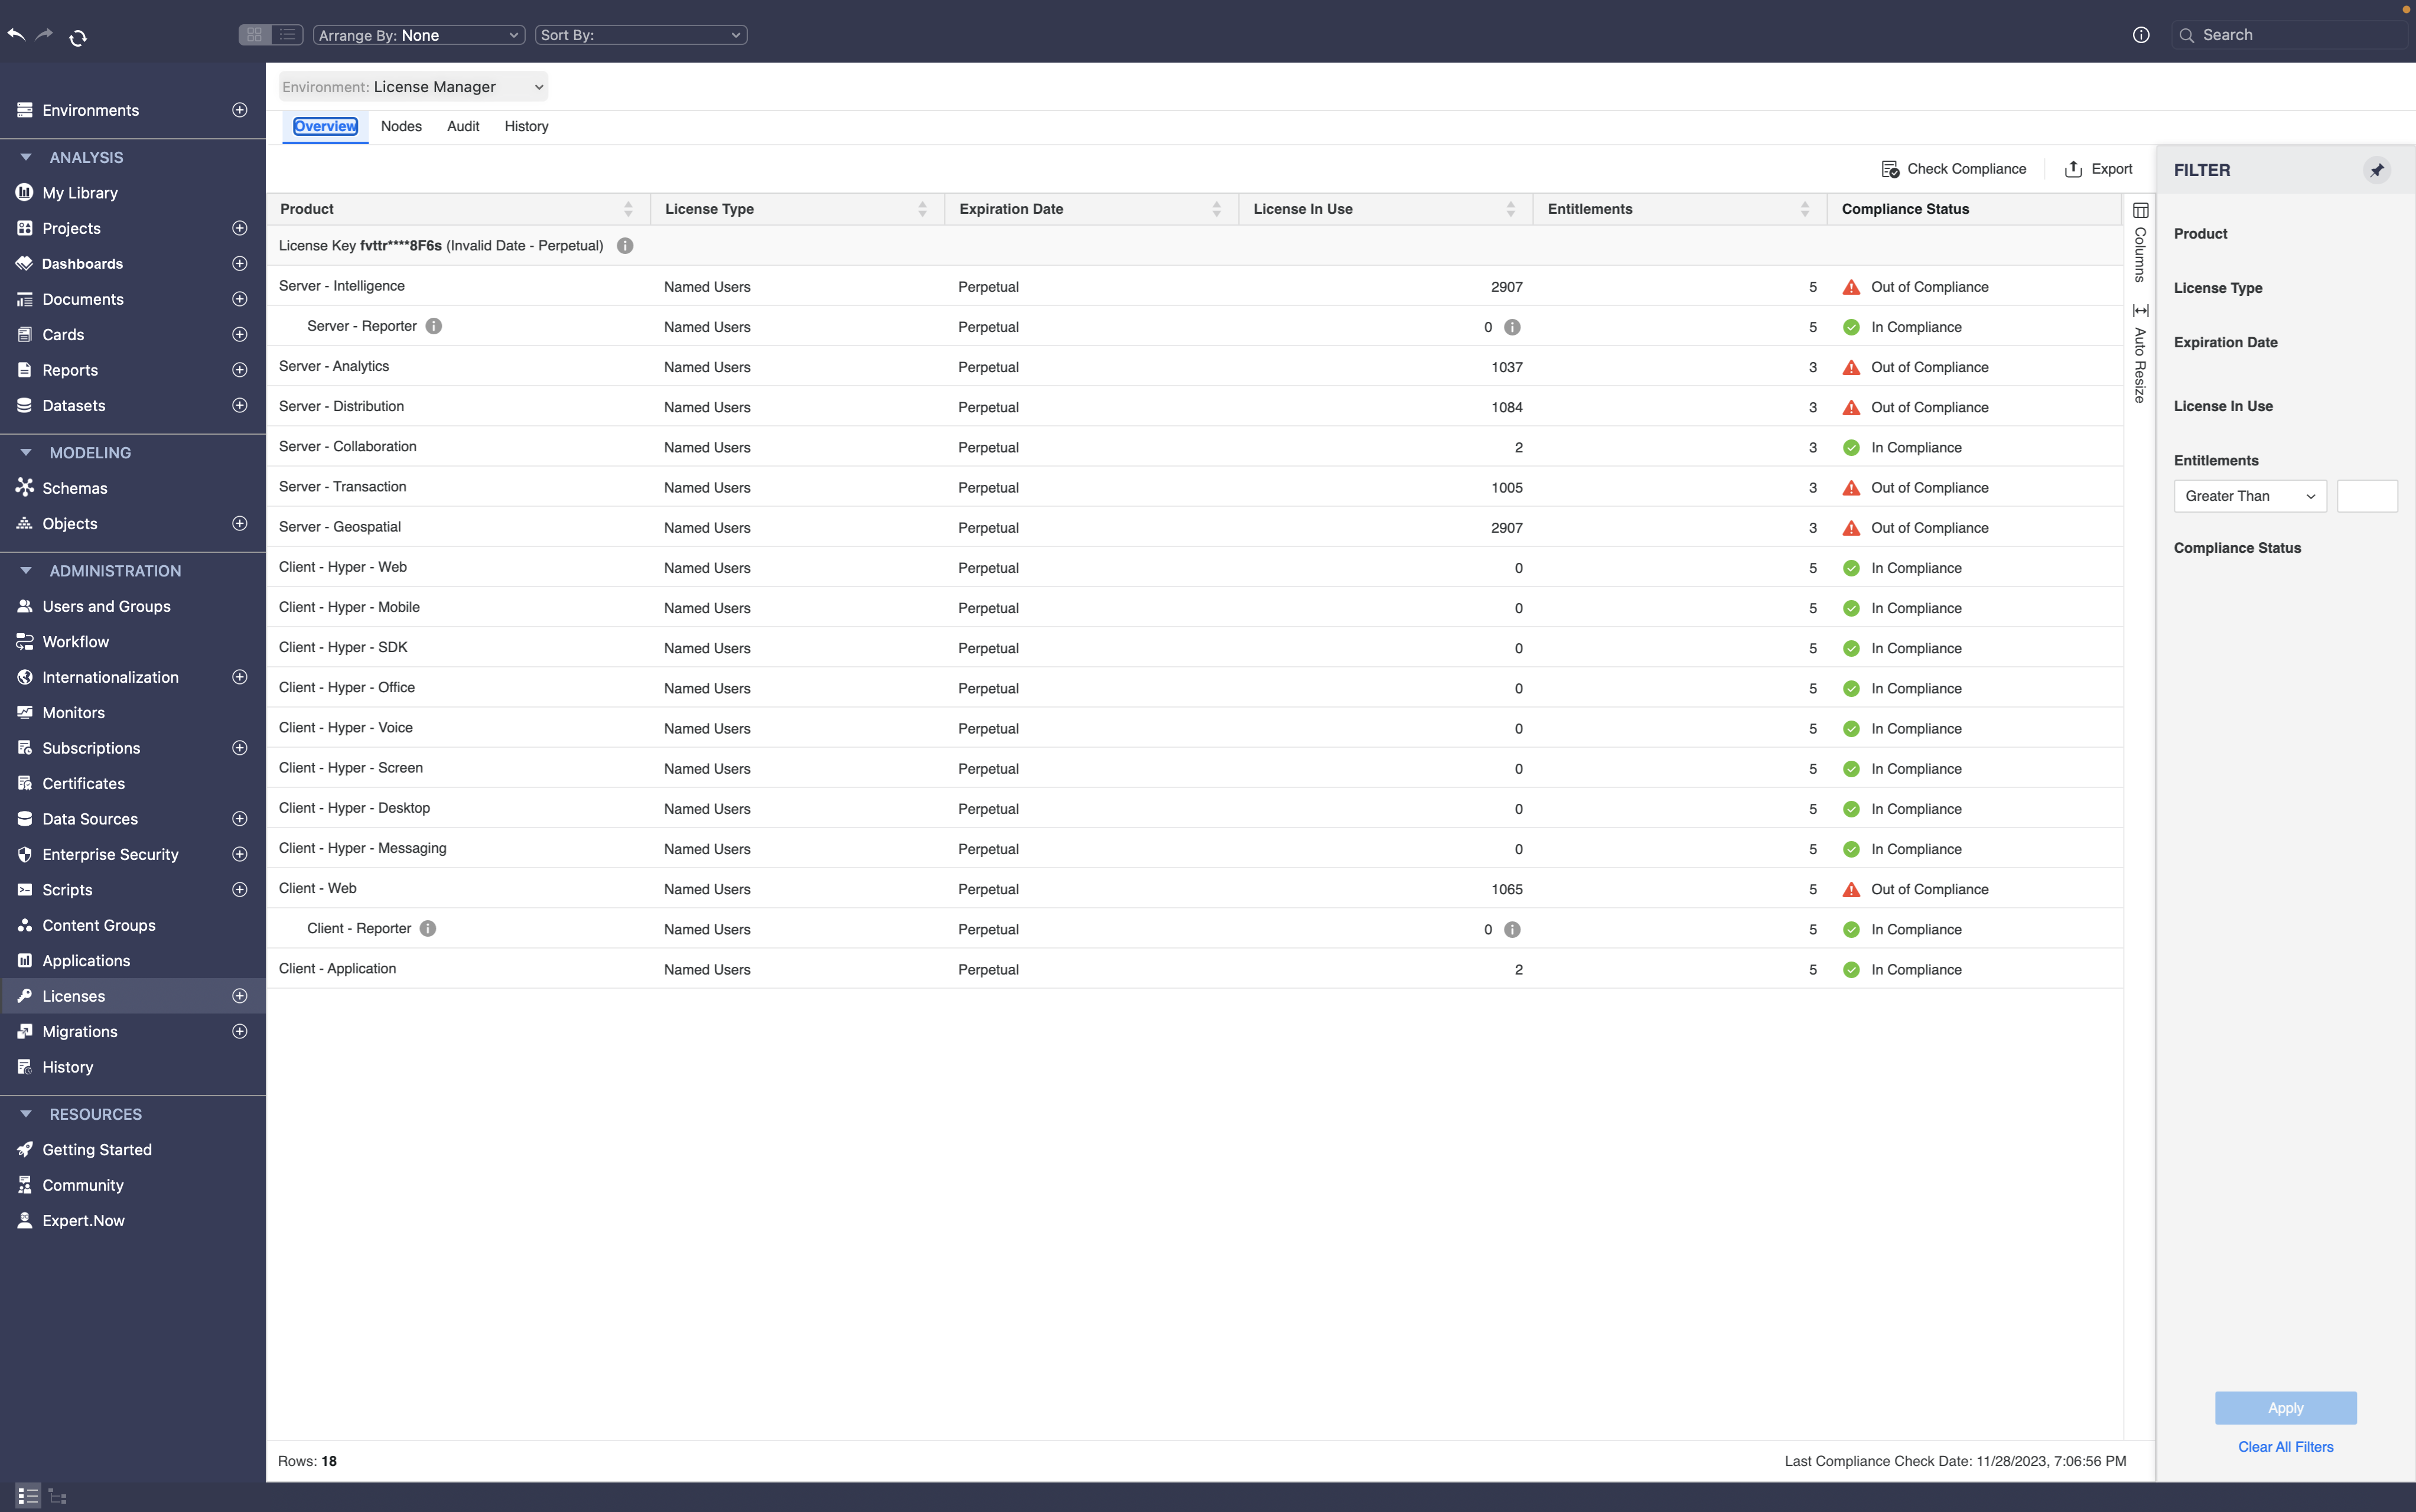
The Overview tab displays all MicroStrategy products installed and determines the number of licenses in use for a product. It displays the number of licenses for a product by license type for all users with at least one privilege assigned to that product.
The Administrator user is not included in the license count.
Administrators play an important role to keep the assigned users and hardware licenses in compliance. If the allotted licenses are not in compliance with the MicroStrategy product license, users might face issues while accessing the product. In addition, products may not work as expected.
For example, if an Administrator assigns the Server – Distribution license for all the users in the environment and expect users to create and share the analytical content, they won’t have access to create the content as the distribution license only allows users to share and receive contenty.
As an Administrator, ensure you run a license compliance check periodically. Compliance checks allows the system to recognize an upgrade that has brought the system back into license compliance. If a product license shows as out of compliance, then an Administrator must take the correct steps to make it compliant.
If you assign a user a privilege and the Compliance Status does not update, you need to restart the Intelligence server.
The Overview tab consists of the following:
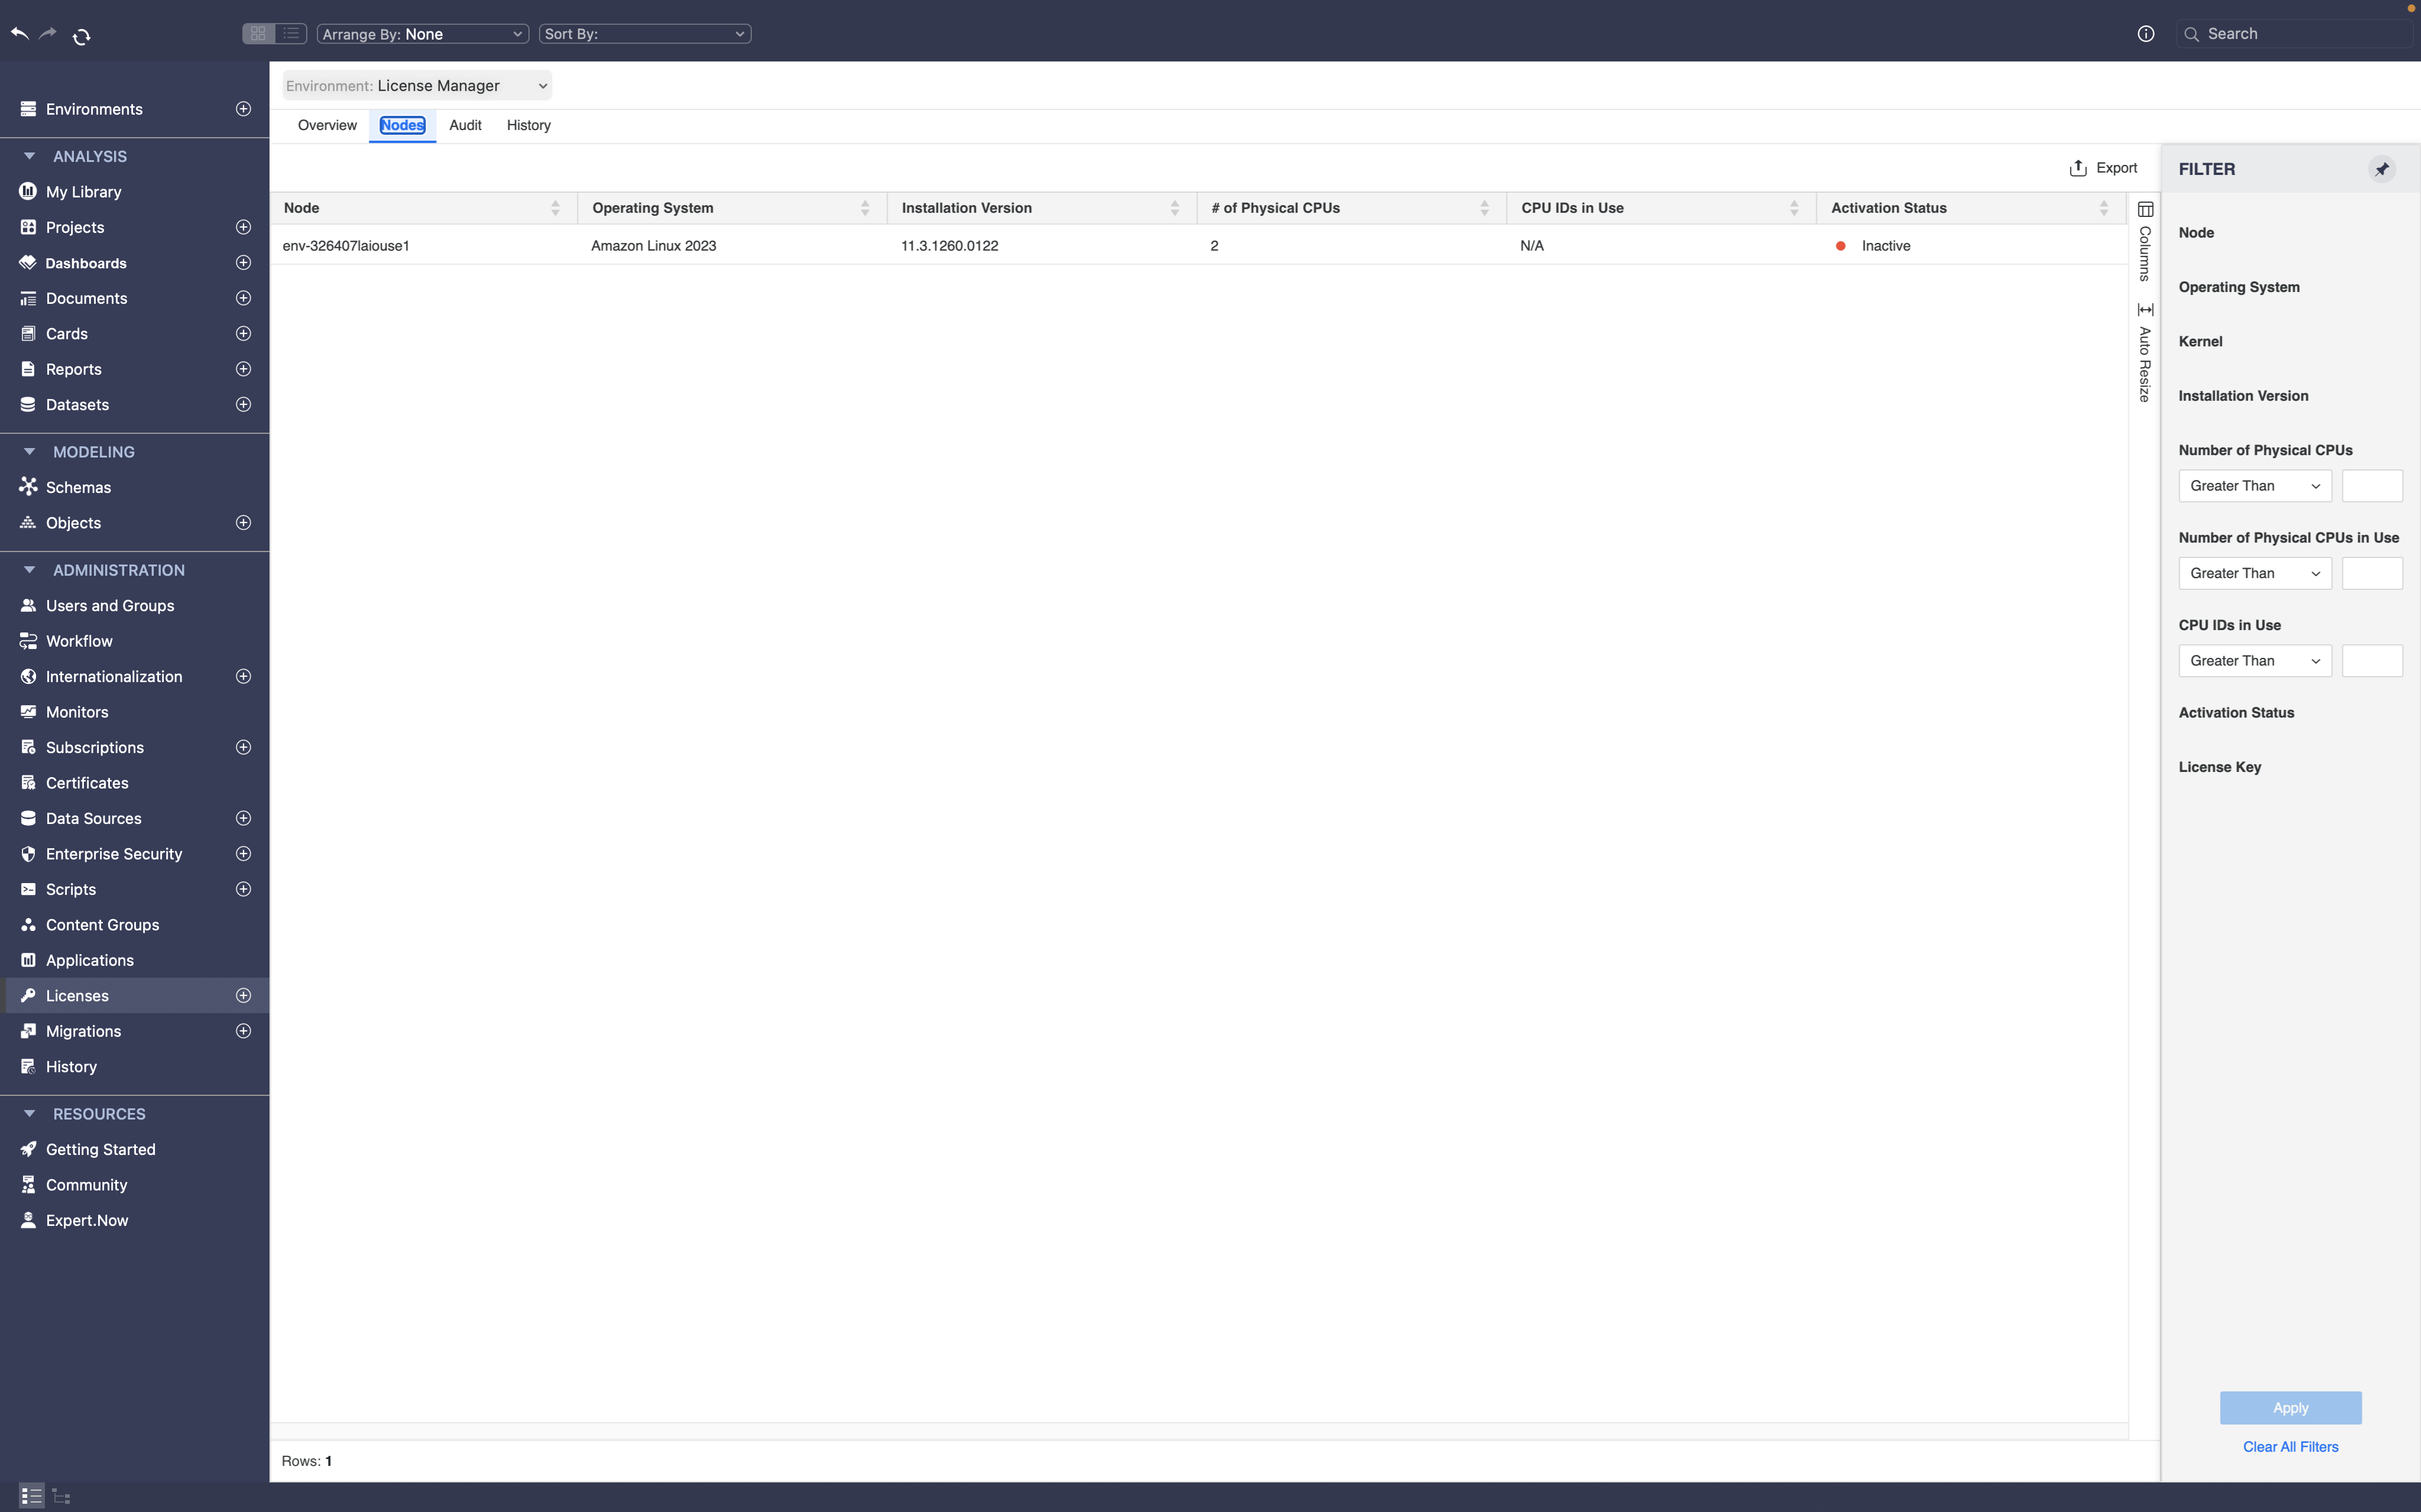
The Nodes tab displaysthe product licenses assigned to each server of a cluster environment. For example, if your environment is a 4-node cluster, this view displays all the licenses by each server node.
The Nodes tab consists of the following:
This number is important if you have a CPU-based license for Intelligence Server.
This is encrypted for security reasons.
Auditing is vital to ensure that the privileges assigned to users or products is in compliance with the licenses purchased
Each user must have at least one privilege per product.
When an audit check is run to check user privileges, this tab displays the associated privileges for each user and product. Audit checks to view product privileges verifies user access. For example, users may not be able to use or access functionality that they don't have the privilege to. One of the first actions that Administrators should take is to ensure that users have the correct privileges.
The Audit tab consists of the following:
The activity date only displays when Platform Analytics is enabled on the environment.

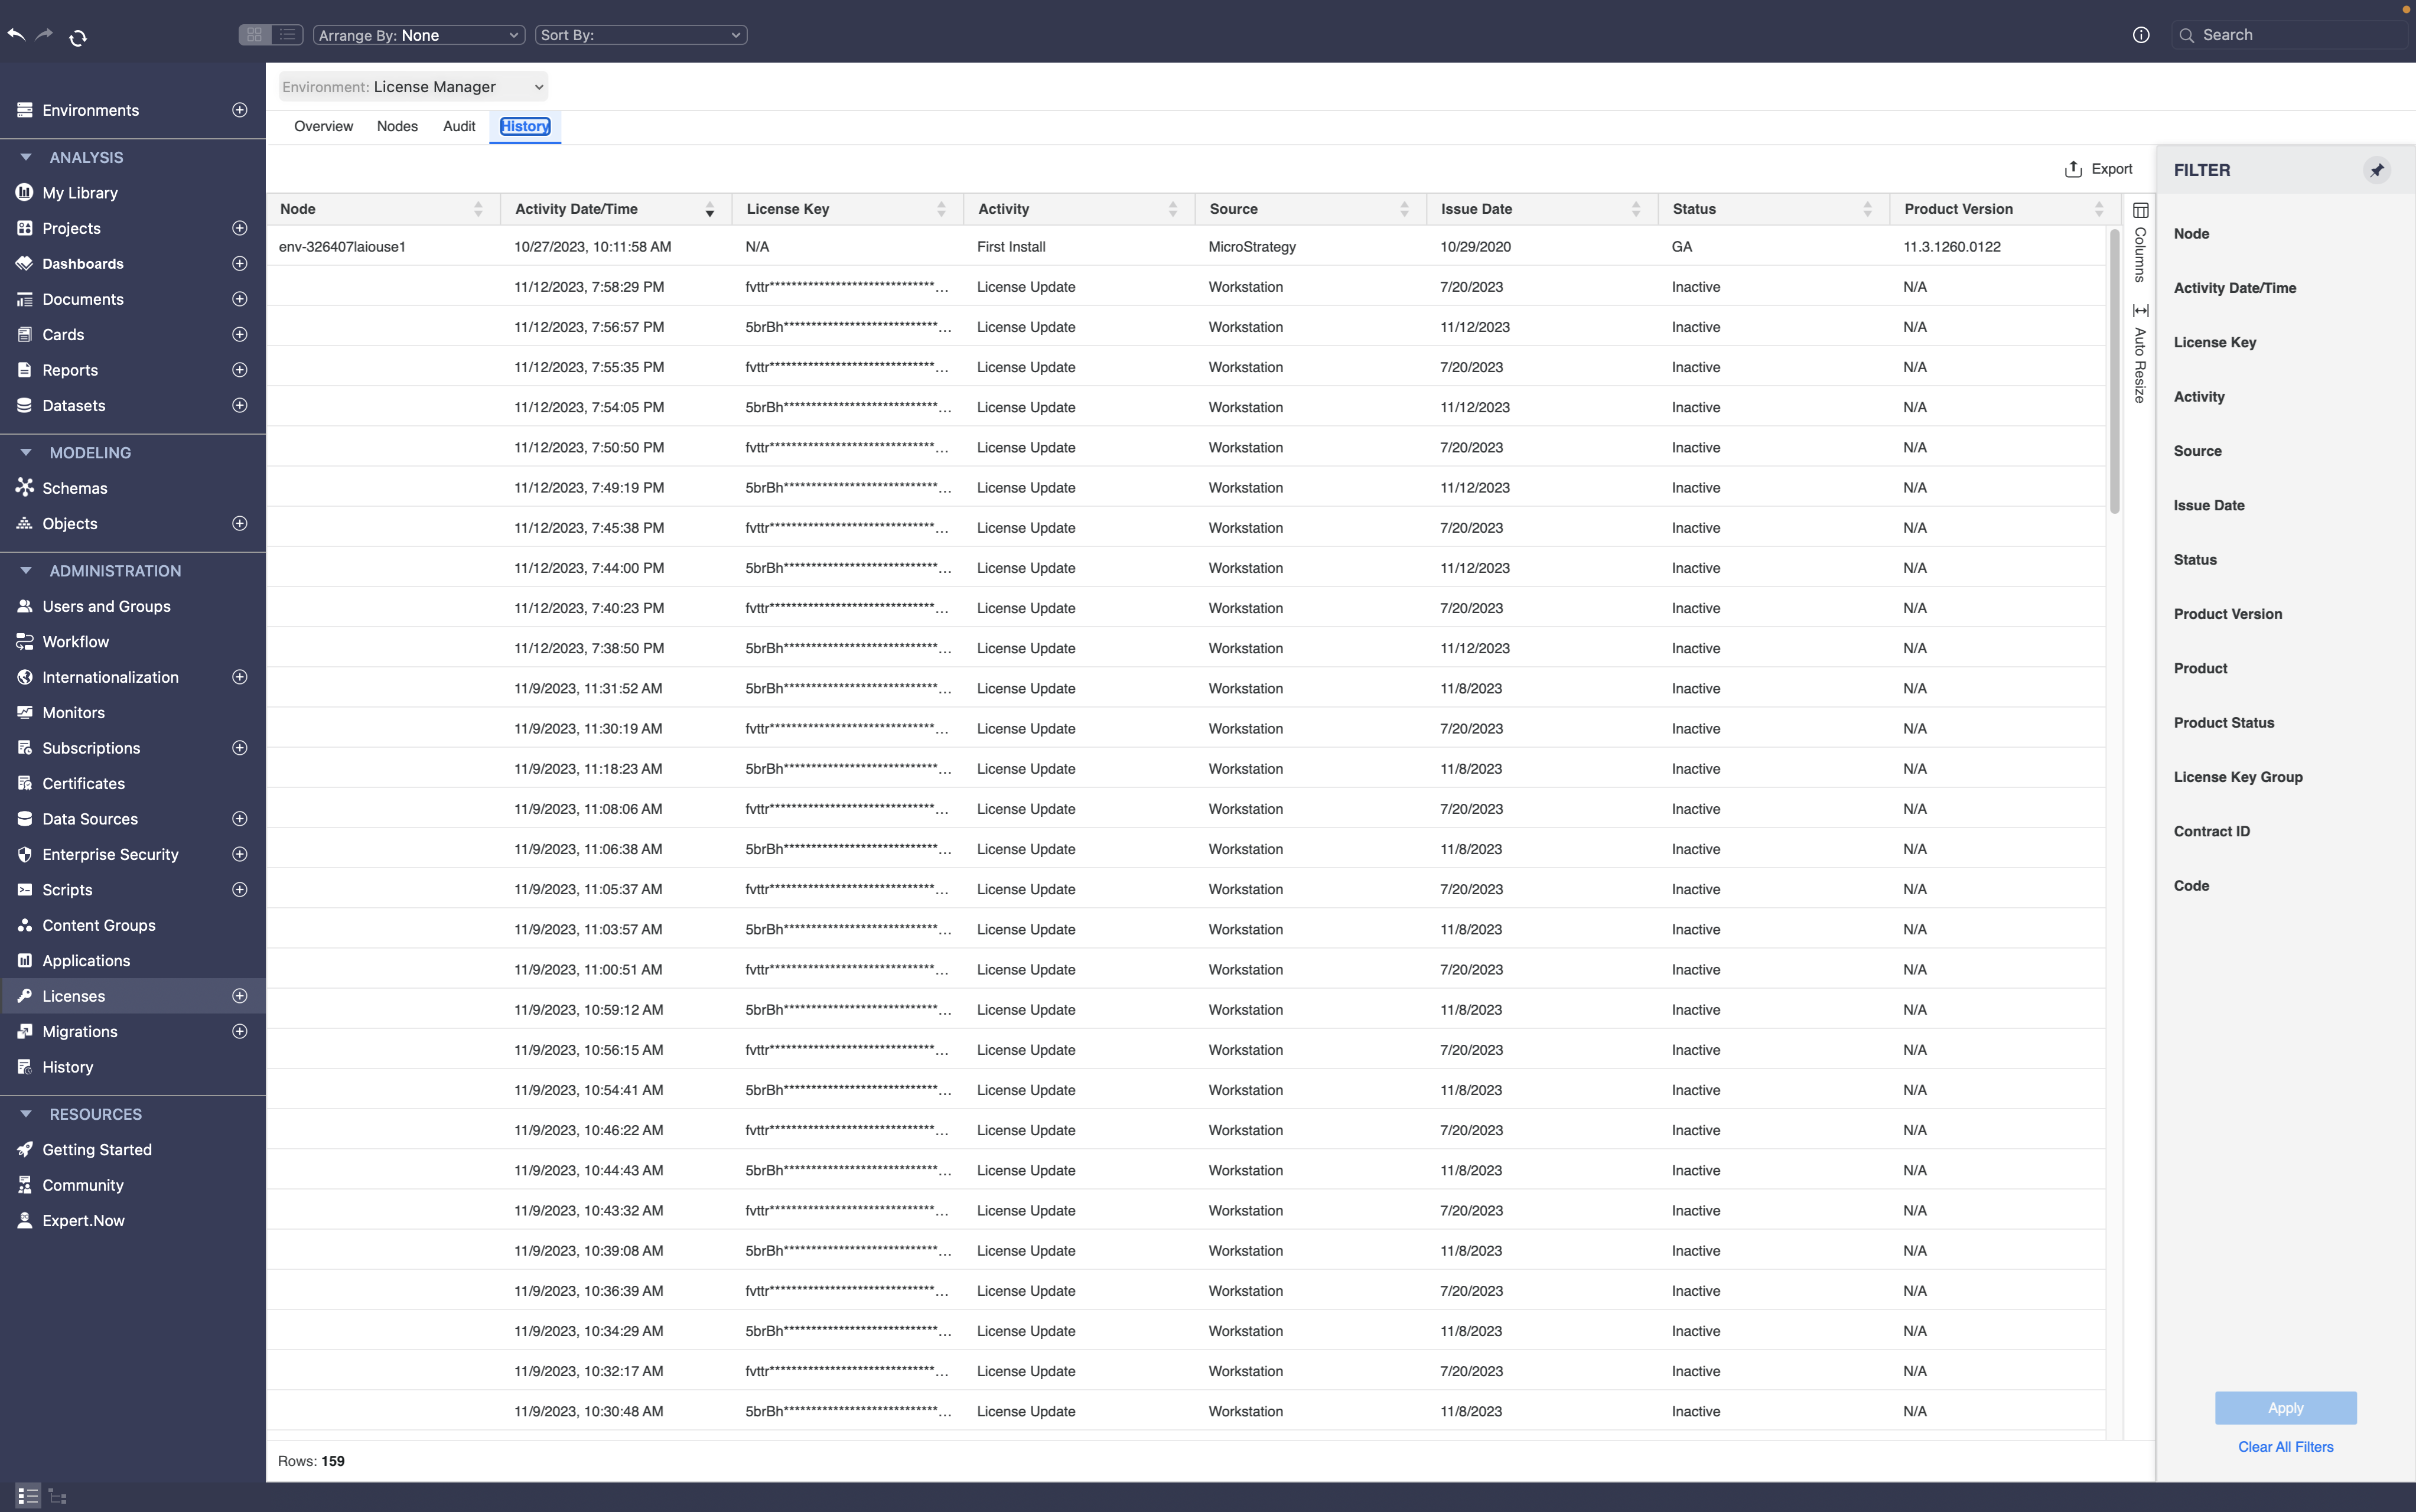
The History tab displays the history of any recent MicroStrategy installations on the server node, the date when the installation or upgrade was performed, and what products were installed or removed.
The History tab consists of the following:
For example, if a server upgrade is made on that server node, this column displays the timestamp of that activity.
Activities include First Install, Upgrade Install, or License update.
For example, MicroStrategy Intelligence, MicroStrategy Distribution Services, etc.
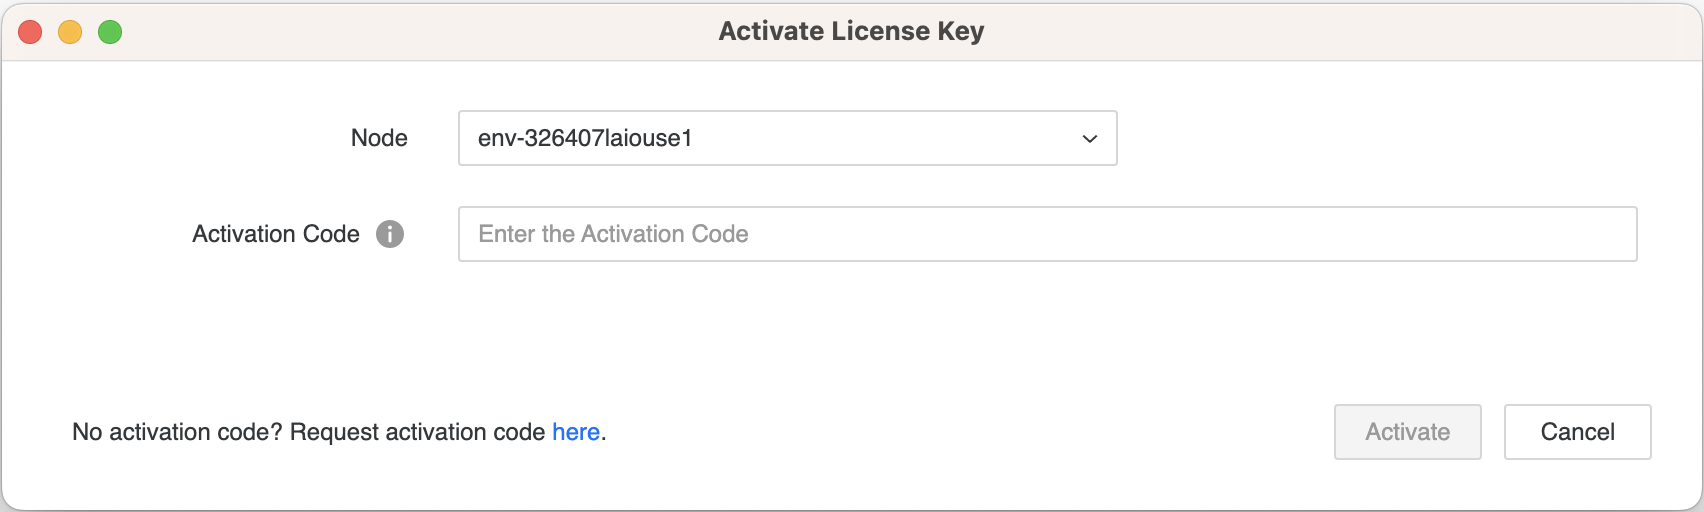
Before you can activate your license key, you must have an Activation Code from MicroStrategy. You can request an Activation Code by supplying MicroStrategy with important information related to your software installation. The information that you provide helps MicroStrategy understand how you plan to use MicroStrategy software. With this information, MicroStrategy can provide better information and technical support for your software configuration.
You can request an Activation Code while activating a license key. If you did not request an Activation Code during the installation, you can request one through Licenses.
These are the steps to Activate a License Key:
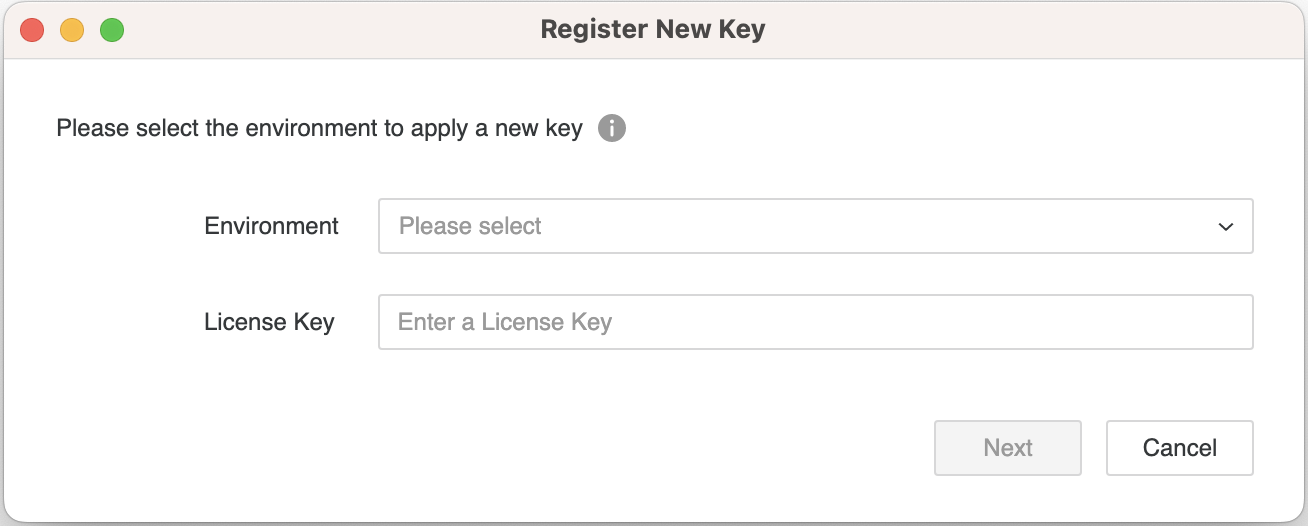
In MicroStrategy Workstation, you can register New Licenses for your environment. Please select a valid environment and have the new license key handy to enter the information under Licenses tab.
These are the steps to Register a New Key:
If you want to migrate a MicroStrategy server product to another environment, you must first deactivate the license on the current environment. Deactivating a license and notifying MicroStrategy of the deactivation is required so MicroStrategy can keep track of your product licenses and server activation status. For example, if MicroStrategy knows that you are no longer using CPUs on a given machine, it can allow the license for those CPUs to be activated and used on another configuration.
These are the steps to Deactivate a License Key: